Measuring, Weighing and Documenting
To capture a baseline, RWND has devised a system of Measuring & Weighing yourself.
The scale alone doesn’t tell the whole story. Neither does measuring or photographic proof, but all of these methods combined (it’s in the APP) are a powerful gauge of progress and success, which is incomparable. When combined with regular logging and analysis of similar workouts, these tools are unparalleled for charting success.
Suggestions for Measuring and Weighing
Measure weekly for those seeking dramatic changes.
Measure monthly for those seeking to maintain health & appearance.
Measure at roughly the same time of day. (Early mornings are best)
Take note of clothing worn and wear the same clothes each time.
Use the same tape measure.
Use the same scale.
Use the same person/trainer to measure.
Each person/trainer will have their own slightly different technique and pull the tape differently.
Measure to the closest quarter of an inch.
Discuss and compare measurements immediately.
Save to a place which CANNOT be lost.
NEVER EVER CHEAT.
Weighing Yourself
Don’t get hung up on this step. If you and the scale have a bad relationship, ditch it. No prob. You don’t need to do this step. If you are cool with the scale and weighing yourself doesn’t trigger emotions of low self-esteem, go for it!
We prefer capturing a 7 day average over evaluating any immediate result taken from a scale.To obtain a 7 day average follow these steps:
1- Record weight daily for 7 days
2 - Add the 7 days together
3 - Divide by 7
Example:
Step 1 - Record weight for 7 days
wt. day 1 - 181
wt. day 2 - 179
wt. day 3 - 178
wt. day 4 - 181
wt. day 5 - 183
wt. day 6 - 180
wt. day 7 - 179
Step 2 - Add 7 days together = 1,261
Step 3 - Divide by 7 = 180.14
We encourage you to keep meticulous track of your progress by using scales (if you can stay emotionally healthy while doing so). It is easier and better information to keep track on the same scale, as there can be small variances between different scales.
Additional Recommendations for Capturing Scale Data
Use digital scales with a “ZEROING” function.
Use the same scale daily.
Measure at roughly the same time each day.
First thing in morning
After bathroom
Stripped
If weighing cannot be done early in the morning you must take note of the following:
Shoes/no shoes
Clothes worn
Recent food/beverage intake
Recent exercise
Capturing Circumference Measurement Data
Consistency is KEY here. There are many methods for capturing measurement data. None quite as important as consistency. Being able to measure at the same spot using the same tension on the tape, time after time, will provide you with more valuable data.
When measuring, it pays to be bold. Just get in there and do it. Do it often. Those who develop a quick and efficient technique will inspire the most confidence in your numbers. It takes practice to develop good technique.
Recommendations for Capturing Circumference Measurement Data
Use 60” flexible tape with numbers on both sides
Find and mark the same sites
Measure 1 side of the body only.
Right side is preferable.
Using a 3 pull average is better than 1
Large anomalies in measurement are indications of measurement error.
Default to the narrowest, and/or widest points.
If there are several widest points default to the “highest wide.”
Wear the same clothes as last measurement.
Where possible, measure bare skin.
Even the smallest fabrics will alter measurements dramatically
You must wait at least 1 hour after a workout before measuring.
Exercising causes blood to pool in the extremities. It alters measurements.
Exercising causes skin to swell (from sweat).
Recommended Measurement Sites and Suggestions
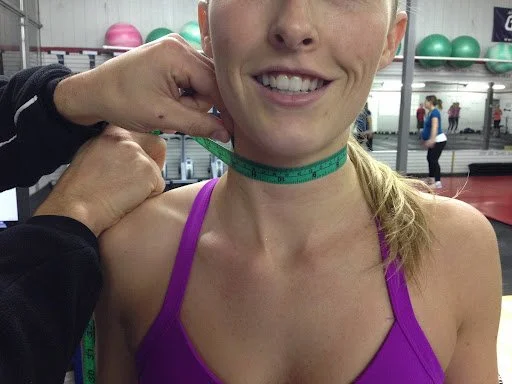
Neck
Measure the circumference of the middle portion of the neck.
Neck is a “litmus test” measurement. It is comparable to the upper arm.
.
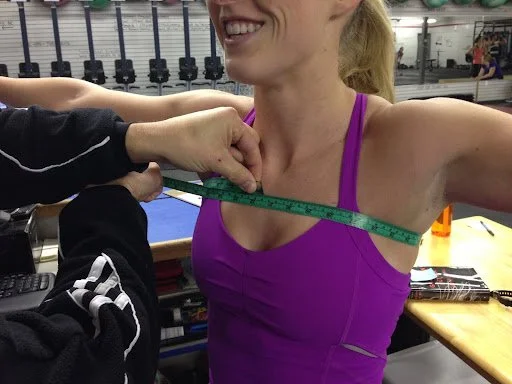
Chest
Arms should remain straight out from the sides.
Take a medium breath in and hold.
Use the slide technique using a slight upward pull.
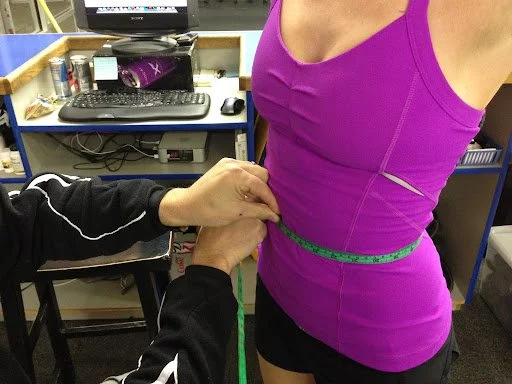
Waist
Measure the narrowest point below the rib cage and above the hips.
If no narrow point measure widest
Measure the “highest wide.”
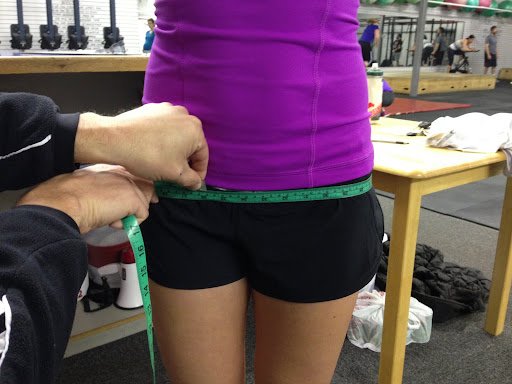
Hips
Measure the widest point of your hips.
Understand hips are 3D. The widest point may be on a spectrum from front to back.
If there are two widest points, measure the “highest wide.”
Hips measurements should occur above the groin.
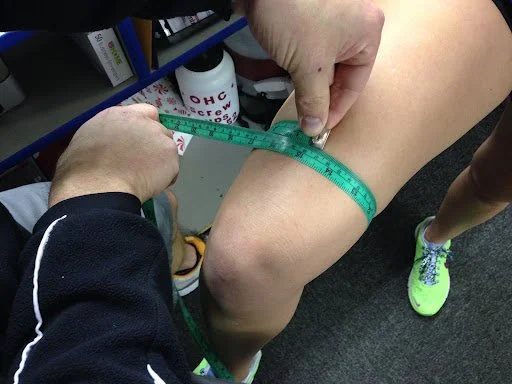
Thigh
Stand without weight on the measured leg.
Bend knee to 90 deg.
Measure 4” from the top, of the back, of the kneecap.
Measure consistently with the entire tape above the mark you made.
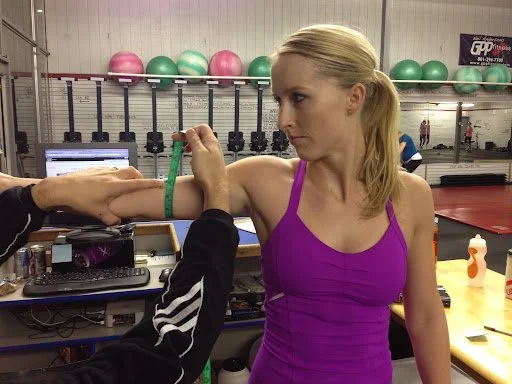
Upper Arm
Measure arm extended from the side, palm up.
Measure 2” from the crease of the elbow.
Many people have several creases. Measure from the highest one for consistency.
Measure consistently with the entire tape above the mark you made.
Compare to the neck.
Changes made in the arm are usually comparable to those made in the neck.If they are not, you should suspect measurement error.
Capture Video or Photos
It is much easier these days to capture video or photographic data, but there are pitfalls. Remember, consistency is key to comparing data. It’s cool because the RWND app has this feature built in. Use it. If you don’t have it, get it. If you can’t get it, here are some general guidelines for capturing consistent data. Use the following suggestions:
Note the background. Make sure it is the same, or as close to the same brightness, color and texture as possible.
Less texture in your background is better.
Brighter colored backgrounds are better.
Note the distance between you and your background. It should be the same. Closer to the background is better.
Note the distance between you and the camera. It should be the same. Closer to the camera, while still fitting in your entire body is preferable.
Note the camera angle. Be sure to take photos from the same angle (up, down, side to side).
Note the aspect ratio. We prefer taller aspects to wider ones.
The sun or a bright light should be shining from the front.
Brighter illumination is better. However, warmer “golden hour lights” make you look better. You see the muscle definition better!
Use the same poses and facial expressions.
Capture photos/video from front, side and back.
Dress in the same clothes.
Darker clothes are better.
Tighter fitting clothes are better.
Fewer clothes are better.